Let's say you wanted to work on pokegold-spaceworld and you are on Windows 10...
Windows setup
-
Make sure WSL is installed, go to Control Panel -> Programs -> Turn Windows features on or off:

-
Download these:
- Git for Windows
- JDK 11
- GameBoy emulator with a good debugger, I recommend BGB
- Ghidra 9.2.3
- GhidraBoy (for Ghidra 9.2.3)
- Ubuntu 20.04 on WSL
- Python
- the base ROM for pokegold-spaceworld.
-
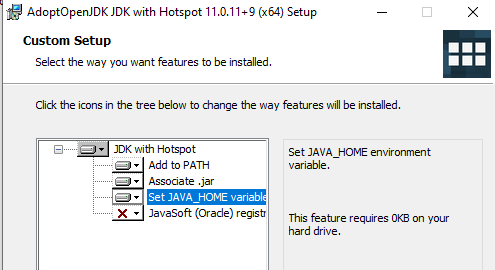
Install JDK 11 by clicking on the MSI, and also you might want to install the "Set JAVA_HOME variable" option too just to be safe:
-
Install Ghidra by extracting the downloaded Ghidra zip to somewhere accessible, and then try double-clicking
ghidraRun.batinside the extracted Ghidra folder. -
After it's all working and you clicked on
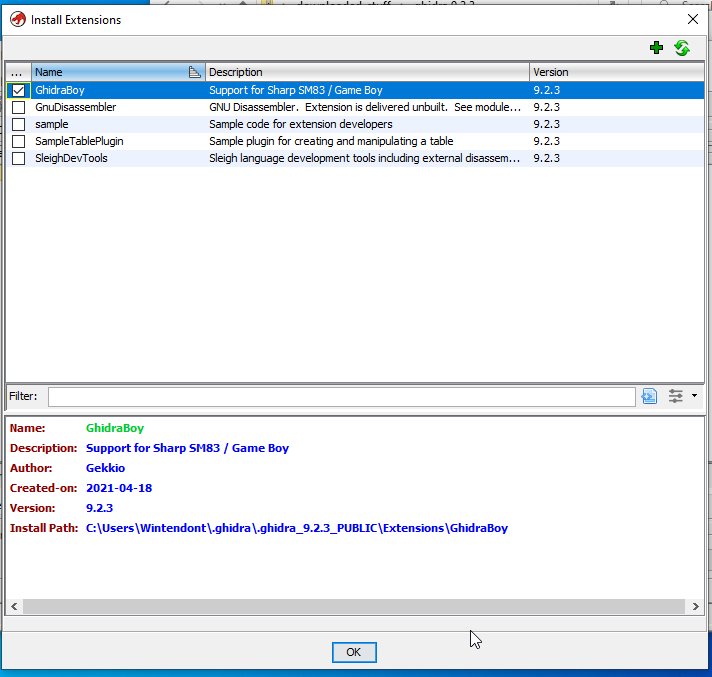
Agree, go to File -> Install Extensions, then click on the green plus icon on the top right and select the GhidraBoy zip you downloaded.

You should now have GhidraBoy on the list after that:
-
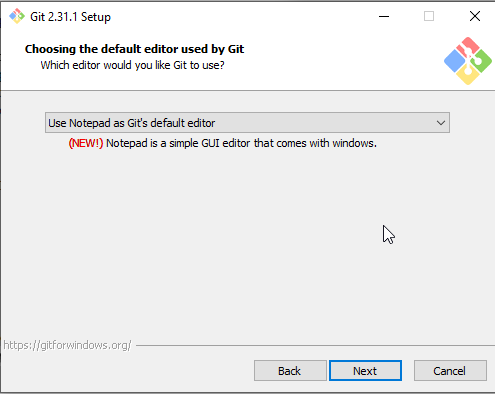
Install Git, use Notepad (or Notepad++) as your default editor, leave everything else default:
-
Clone the
pokegold-spaceworldrepository, go to somewhere you want the repo folder to be on, right click, click on "Git Bash here", and then type in:git clone https://github.com/pret/pokegold-spaceworld -
Enter
cd pokegold-spaceworldinto the prompt, then enterpwd.
Note this directory for later, you might want to copy that to a notepad or something.
IMPORTANT: if your username happens to contain spaces (in place of mine, Wintendont), place a backslash \ before every space!

-
The base ROM (the Pokemon Gold debug ROM) should be placed inside the repo folder as
baserom.gb. -
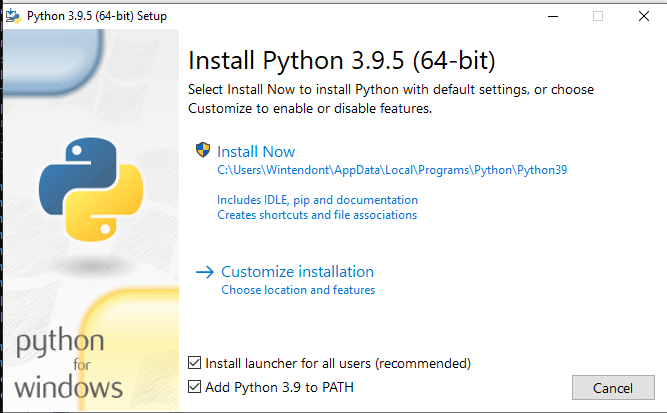
Install Python, make sure you check
Add Python 3.9 to PATHso we can use it from the command line later.
-
Open the Ubuntu 20.04 app, set your username and password, and enter the following in the opened prompt.
WSL setup
Note that you can copy these statements and paste them into the command prompt by right-clicking or pressing Shift+Insert.
-
Update repo mirrors and install the RGBDS dependencies:
sudo apt update sudo apt install libpng-dev pkg-config build-essential bison git p7zip-full -
Download
rgbenv, this will allow you to manage multiple RGBDS versions (in case you want to switch from repo to repo), as well as update them easily.sudo sh -c 'curl https://raw.githubusercontent.com/ZoomTen/gbdevstuff/master/scripts/rgbenv > /usr/local/bin/rgbenv' -
Ensure
rgbenv, is downloaded to the right directory, then set it as an executable:ls /usr/local/bin/rgbenv sudo chmod +x /usr/local/bin/rgbenv -
Install RGBDS 0.6.1, Enter 'yes' to the prompt that appears:
rgbenv install 0.6.1 rgbenv use 0.6.1 -
Make the command prompt see our installed RGBDS, since it's locally-installed.
echo "export PATH=\"$HOME/.config/rgbenv/bin:\$PATH\"" >> ~/.bash_profile echo "export PATH=\"$HOME/.config/rgbenv/bin:\$PATH\"" >> ~/.bashrc source ~/.bashrc -
Link the
pokegold-spaceworldfolder. This is where thepwddirectory from earlier kicks in, but you also need to add/mntbefore the /c/ part. In my case I made it in the desktop, so it will be:ln -s /mnt/c/Users/Wintendont/Desktop/pokegold-spaceworld pokegold-spaceworld -
Move into the linked folder, then try building it:
cd pokegold-spaceworld
make -j2
-
Using a Game Boy emulator, try playing around with the built ROM. It should be inside the repo folder, and is the one that ends in
correctheader.gb.
Ghidra setup
-
In Ghidra, click on File -> New Project. I recommend making a directory for Ghidra projects, then set
Project Directoryto that.

-
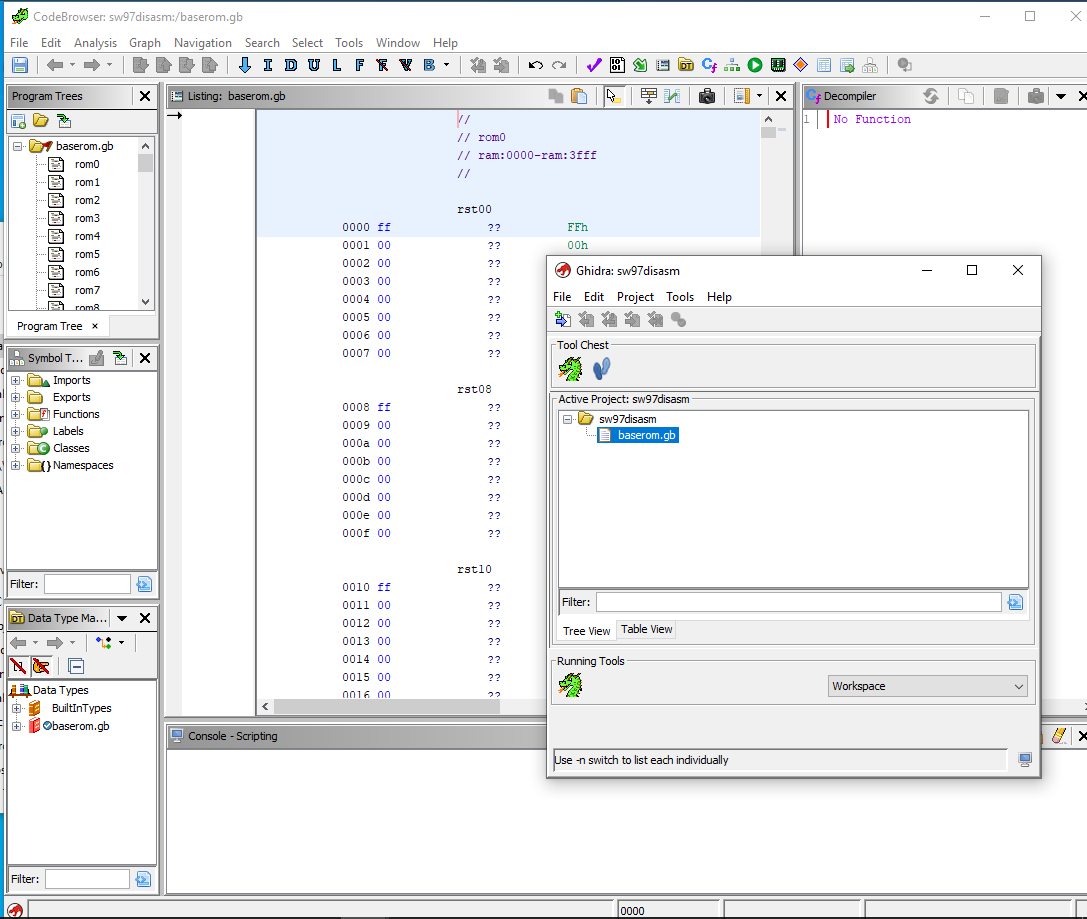
After the project has been created, import our baserom.gb. Click on OK, then double click on the baserom.gb entry that appears in the project manager.
-
When prompted to analyze, say No.
-
Download this script to the Ghidra folder, under
Ghidra/Features/Python/ghidra_scripts. -
Go to Window -> Script Manager and hit the
 Refresh icon. Then go to the
 Symbolscategory, and selectImportGBSymbols.pyand hit the Run Script icon, which looks like a Play button.
Then, load the sym file generated by the build process, which is in the repo directory again. Which one? Doesn't matter lol

The symbols from the disassembly should be loaded, which should make it easier to work with and add stuff to the disassembly. Without this step, we'd have to write the function names ourselves every time.

-
Close the decompiler window, it's useless for Game Boy disassemblies unless it's known that it's written in C (which is unlikely for most commercial games)
Trying out the disassembly features
-
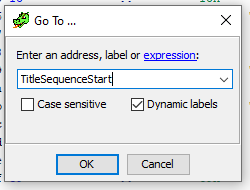
Press G in the code browser to open up the Go-to dialog. Let's look at the code for the title screen, which should be in TitleSequenceStart:
-
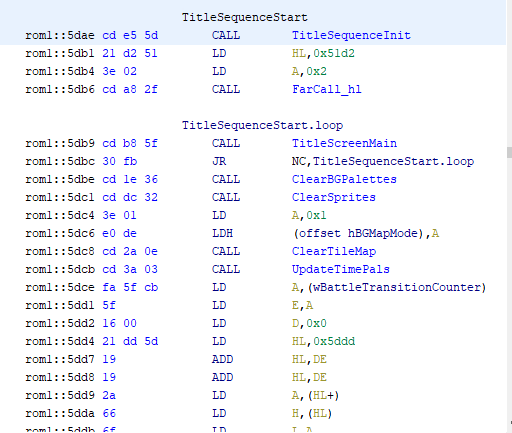
Press D to disassemble it and see some code:
-
FarCall_hlis the function that runs code that is located in another bank. In this case, it wants something from bank 2, while the code we are looking at is in bank 1 (that's therom1stands for here - do note the bank number in Ghidra is in decimal, while offsets are hexadecimal).
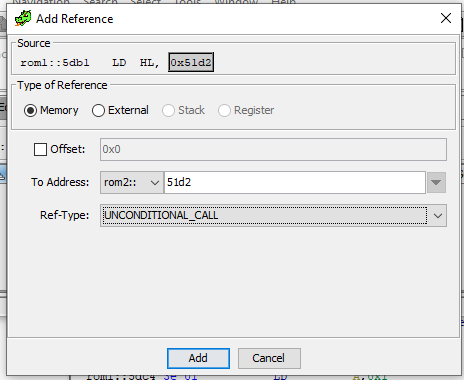
We seeld hl, 0x51d2andld a, 0x2.hlcontains the offset of the function, andacontains the bank where it is located. We can add a reference to it.
Click on the0x51d2and hit R. A new window should open. Hit the plus icon, and another window opens. In theTo Addressfield, selectrom2::, since the function is in bank 2. The reftype doesn't really matter, but if you really want to get it right, it's anUNCONDITIONAL_CALL.
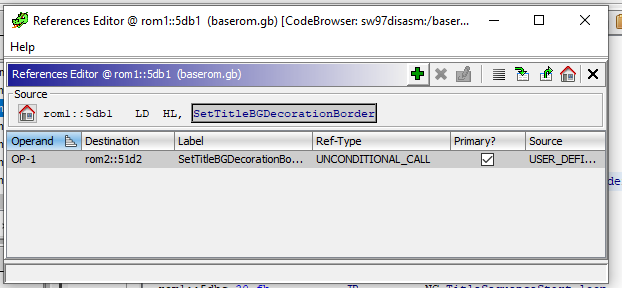
-
In the
rom1::5dd4line, we have a local reference to0x5ddd. Click that, and hit Ctrl+Alt+R. You can see that it will automatically resolve toTitleScreenJumpTable. -
As both of them have references, we now have:
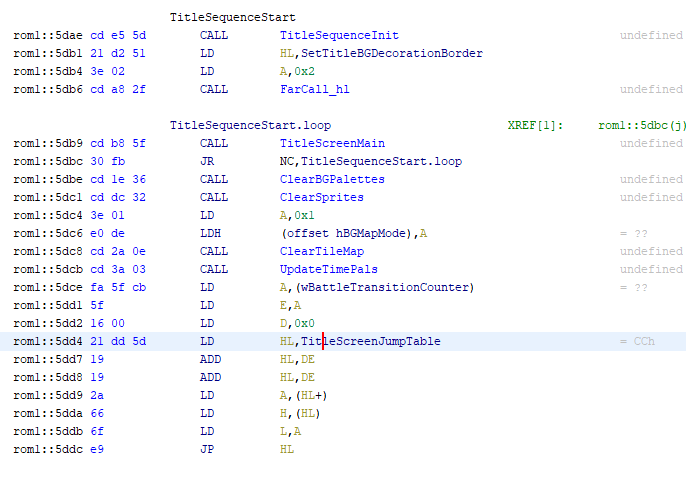
Please note, Ghidra does not make neat descriptive labels like that, as it is provided by the disassembly.
If a function has not been disassembled yet, it will have a label such as LAB_rom63__4123 - and this is where you come in!
This process of disassembling isn't just translating machine code to Game Boy assembly, you also have to analyze it, figure out how it works (possibly make assumptions along the way, a good debugger is important for this), label accordingly, contexualize it, and optimize it using the disassembly macros.
Knowledge of Game Boy hardware is somewhat needed with this, although you can learn it as you go.
Exporting to a "pret-compliant" asm file
This needs its whole section, since Ghidra's export feature is not intended for a full IDA-style disassembly export.
It's especially problematic when used with GhidraBoy, since it will translate some instructions into completely different instructions! e.g. ld [hl], 4 is NOT the same as ld hl, 4, yet the export option renders the former as the latter for some reason.
"pret-compliant" refers to this style guide, which is being followed by the pret Game Boy disassembly projects.
-
Create a folder to store the exported stuff to, for example a folder called
disassembly. -
Download this script to that folder.
-
Create a batch file containing one line:
python ghidra2asm.py something.txt > something.asm.
Name it whatever (like convert.bat). You will have to edit this file for every text file you export. -
Select the code you want to export, and then copy it. Literally. Copy it with Ctrl+C, and then paste it to a new text file.
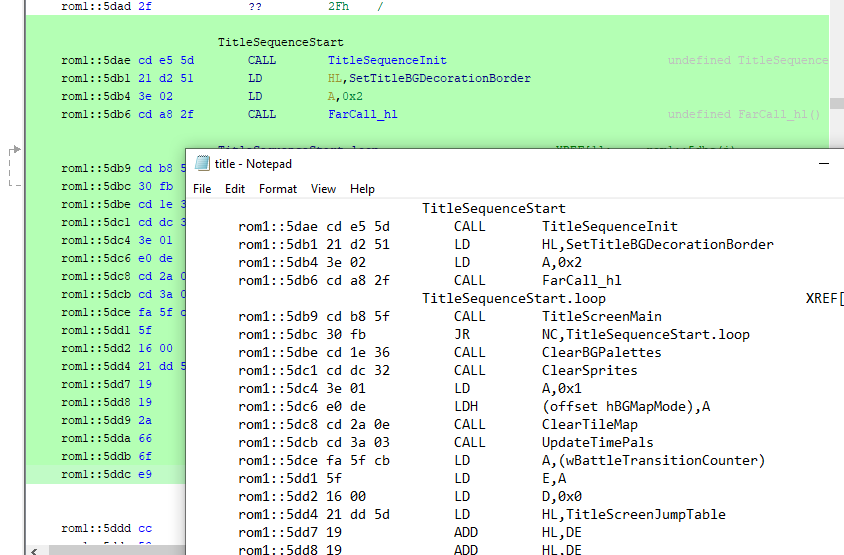
-
In this case, the text file is title.txt. So the batch file will contain:
python ghidra2asm.py title.txt > title.asm -
Double click the batch file. You should have a new file
title.asm.
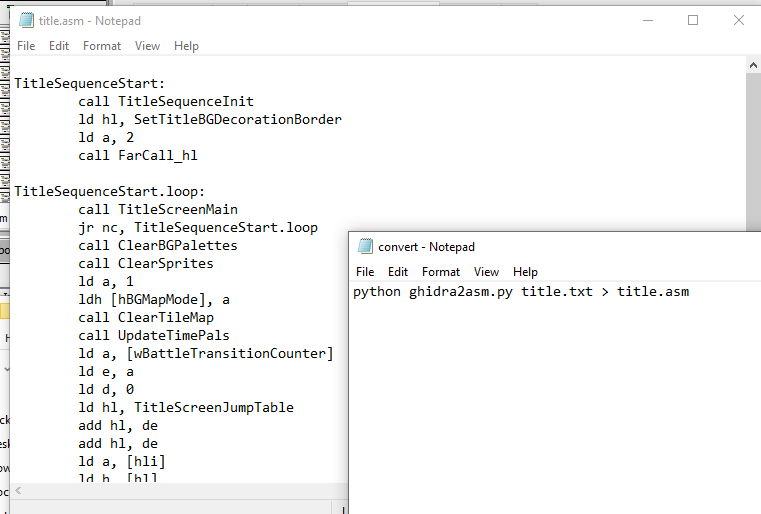
Yet more work is needed to turn it into an actual asm file for the disassembly, however I think this is a good starting point for it. This title screen routine has already been disassembled in engine/movie/title.asm